Easy Installation Tips for Wall Laminate Sheets
Laminate sheets have grow to be a popular preference among indoors designers and house owners due to their sturdiness, aesthetic attraction, and coffee maintenance. These flexible substances are perfect for enhancing wall surfaces, giving any space a graceful, current appearance. If you are looking to deploy wall laminate sheets and need it to be a continuing DIY undertaking or are simply curious approximately the technique, this blog will manual you with sensible guidelines from an interior dressmaker’s attitude.
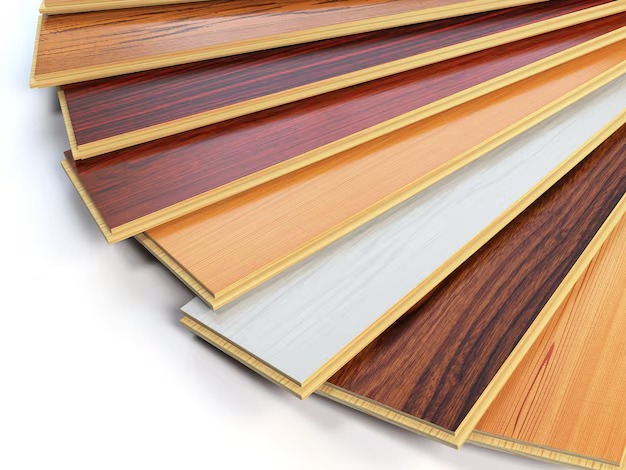
Why Choose Wall Laminate Sheets?
Wall laminates offer several advantages. They come in plenty of styles, colours, and textures, making it easy to fit them with the layout of your own home or office. Whether you are aiming for a wooden, stone, or marble-like end, laminate sheets have you ever blanketed. Additionally, laminates are resistant to scratches, moisture, and stains, making them perfect for lengthy-time period use.
However, the appeal of these laminates virtually shines whilst they may be set up efficiently. Proper installation guarantees that they continue to be intact, maintain their visible attraction, and stand the take a look at of time. Here are a few clean recommendations to put in wall laminates like a seasoned.
Step-by-Step Guide to Installing Wall Laminate Sheets
1. Prepare the Wall Surface
Before installing, it’s crucial to make certain that the wall is easy, easy, and dry. Any dust, moisture, or bumps can avert the adhesion of the laminate sheets.
Tip: If the wall has any cracks or dents, fill them with putty and sand it down to a smooth surface.
Pro Insight: For walls with vintage paint or wallpaper, eliminating the pinnacle layer allows the adhesive stick higher.
2. Measure and Cut the Laminate Sheets Accurately
Accurate measurement is important to avoid material wastage. Use a measuring tape to calculate the peak and width of the wall wherein the laminates could be carried out.
Tip: Leave a touch extra space on the laminate for very last trimming, specifically round corners or irregular regions like electric outlets.
Pro Insight: Always use a sharp cutter or saw for clean edges and avoid uneven cuts.
3. Apply the Adhesive Carefully
Choosing the right adhesive is essential. For wall laminates, contact adhesives are normally used due to the fact they bond quick and hold the laminate firmly in vicinity.
Tip: Apply adhesive calmly on each the wall and the again of the laminate sheet. Wait a couple of minutes till the adhesive becomes tacky before putting the sheet.
Pro Insight: Use a small curler to spread the adhesive lightly and save you air bubbles at some point of installation.
4. Align and Place the Laminate Sheet with Precision
Once the adhesive is ready, align the laminate sheet with the marked area on the wall. Start from the top and gently press the sheet down, working your way towards the bottom.
Tip: Use a rubber mallet or hand roller to press the laminate firmly against the wall.
Pro Insight: Working in pairs can make this process easier. One person can align the sheet while the other smooths it out.
5. Trim the Edges for a Professional Finish
After the laminate sheet is secured, use a utility knife to trim any excess material along the edges. This ensures a neat and precise finish.
Tip: For curved or detailed areas, use fine sandpaper to smooth out the edges.
Pro Insight: Adding a thin border or molding around the edges gives the installation a polished look.
6. Seal the Seams and Corners
To prevent moisture or dust from getting trapped, it’s essential to seal the seams and corners of the laminate installation.
Tip: Use silicone-based sealant for a strong bond. This also enhances the laminate’s durability, especially in kitchens and bathrooms.
Pro Insight: If the laminate sheet design has patterns, ensure the seams align to maintain visual continuity.
Maintenance Tips Post-Installation
Once the wall laminate is set up, it’s critical to comply with a few care guidelines to maintain them searching pristine.
- Wipe frequently with a gentle, damp fabric to dispose of dirt.
- Avoid harsh chemicals as they may damage the laminate’s end.
- Inspect seams periodically to make sure there may be no moisture construct-up, particularly in humid regions like kitchens or bathrooms.
Conclusion
Installing laminate sheets on walls is an smooth manner to raise your interiors without lots problem. Whether you’re opting for a warm wood finish or a swish marble appearance, the important thing lies in right preparation and precise application. By following the pointers above, you’ll reap expert-level consequences at the same time as saving on labor charges.